

Struggling with removing that electronic toy from your Jumperoo? You’re not alone.
Many parents find themselves puzzled over this seemingly simple task. But fear not! In this guide, you’ll discover an easy, step-by-step method to safely and efficiently detach that electronic toy from your Jumperoo without any hassle. Imagine the peace of mind you’ll feel once you’ve mastered this task.
With our straightforward instructions, you’ll save time and keep your little one’s play area in top condition. Keep reading to unlock the secrets to a stress-free toy removal process.
Credit: www.walmart.ca
Prepare The Jumperoo
Preparing the Jumperoo is the first step to safely remove the electronic toy. This process ensures the area is safe and ready for the task. Proper preparation prevents damage and makes removal easier. Follow simple steps to get started.
Clear The Area
Remove any objects near the Jumperoo. Keep the space free from toys, furniture, and clutter. This helps avoid accidents and gives you room to work. A clean area lets you focus on removing the electronic toy without distractions.
Gather Necessary Tools
Collect all tools needed for removal before starting. Common tools include screwdrivers, pliers, and a small cloth. Having tools ready saves time and reduces frustration. Check if batteries need removal or if any screws hold the toy in place.

Credit: www.amazon.co.uk
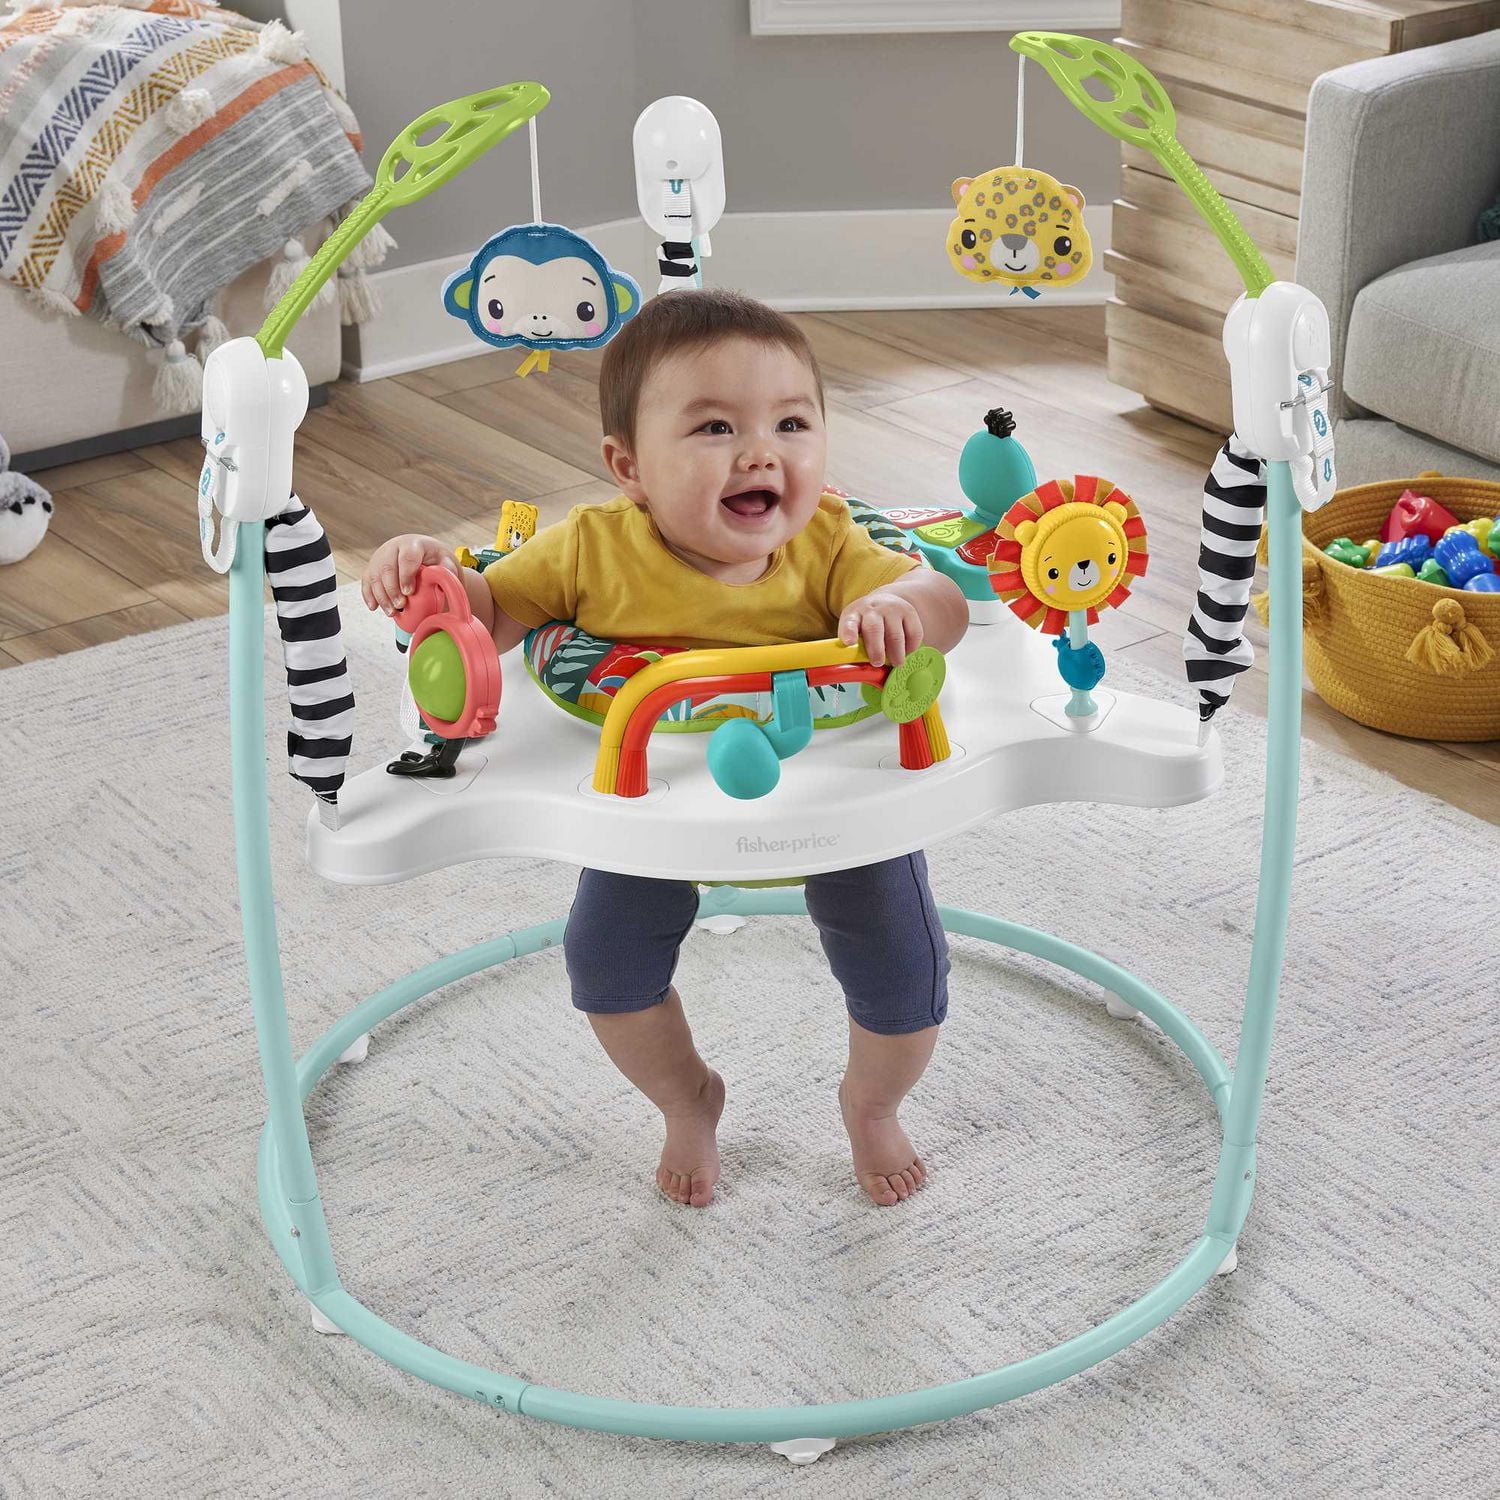
Locate Attachment Points
Locating the attachment points is the first step to removing the electronic toy from a Jumperoo. These points hold the toy securely in place. Knowing where they are helps you detach the toy safely. It prevents damage to both the toy and the Jumperoo.
Identify Screws And Clips
Check the toy for visible screws or clips. Screws usually hold the toy firmly on the frame. Use a screwdriver to remove them carefully. Clips may snap on or off and can be pressed or pulled.
Look for plastic or metal parts near the base of the toy. They often serve as clips. Gently test if they move without forcing them. This reduces the risk of breaking the toy or Jumperoo.
Check For Hidden Fasteners
Some fasteners hide under labels or padding. Carefully peel back stickers or fabric to see underneath. Use a flashlight for better visibility in dark spots. Hidden fasteners may also be inside small compartments or behind panels.
Use a small tool like a flathead screwdriver to open covers. Always handle with care. Missing these fasteners can cause damage when pulling the toy off.
Remove The Electronic Toy
Removing the electronic toy from a Jumperoo might seem tricky at first, but it’s simpler than you think. Taking it out carefully prevents any damage to both the toy and the jumperoo itself. Let’s look at how to remove it smoothly without stressing over broken parts or lost screws.
Unscrew Carefully
Start by locating the screws that hold the electronic toy in place. Use a screwdriver that fits the screws snugly to avoid stripping them.
Turn each screw slowly and steadily. Rushing might cause the screw to slip or the plastic to crack.
Keep the screws in a small container or magnetic tray so you don’t lose them. Have you ever lost tiny screws and wished you had a better system? This small step saves time and frustration later.
Detach Clips Gently
After removing the screws, check for clips or tabs securing the toy. These clips are usually plastic and can break if pulled too hard.
Press or slide the clips gently while lifting the toy away. If you feel resistance, stop and look for another clip you might have missed.
Handling clips with care maintains the jumperoo’s integrity and allows you to reattach the toy easily when needed.
Test And Clean The Jumperoo
After you’ve carefully removed the electronic toy from your jumperoo, it’s crucial to test and clean the entire setup. This step ensures safety and keeps the jumperoo in good condition for your little one’s next playtime. Taking a moment to check stability and clean the surface can prevent accidents and prolong the life of the jumperoo.
Ensure Stability
Before reattaching or using the jumperoo again, make sure it stands firmly on the floor. Gently shake the frame to check for any wobbling or loose parts.
If you notice any instability, tighten screws or connectors immediately. Sometimes, small screws can loosen after removing attachments, which might cause the jumperoo to tip over.
Have you ever had a toy suddenly tip during play? That’s why a quick stability check is essential every time you remove or add parts.
Clean The Surface
Wiping down the jumperoo surface removes dust, crumbs, and sticky residue left by the electronic toy. Use a mild soap solution with a soft cloth to clean all plastic and fabric parts.
Pay special attention to the areas where the toy was attached. Dirt can build up in these spots, making future attachments difficult or less secure.
Don’t forget to dry the surfaces completely to avoid slippery spots that could be hazardous. Clean surfaces not only look better but also help keep your baby healthy and comfortable during play.

Credit: www.amazon.co.uk
Frequently Asked Questions
How Do I Safely Detach The Electronic Toy From Jumperoo?
To safely remove the electronic toy, first turn off the Jumperoo. Locate the attachment points, usually clips or screws. Gently unclip or unscrew the toy without forcing it. Handle with care to avoid damage to both the toy and Jumperoo.
What Tools Are Needed To Remove Jumperoo Electronic Toy?
Most electronic toys on Jumperoo can be removed without special tools. However, a small screwdriver may be helpful for screws. Always check the toy’s attachment method first. Using the right tool ensures a smooth and damage-free removal process.
Can I Replace The Electronic Toy On Jumperoo Easily?
Yes, replacing the electronic toy is straightforward. After removal, align the new toy with the attachment points. Secure it by clipping or screwing it back in place. Make sure it’s firmly attached before use to ensure safety and functionality.
Why Is My Jumperoo Electronic Toy Hard To Remove?
The toy might be tightly secured or attached with hidden clips. Check for safety locks or screws that prevent accidental removal. Avoid using excessive force to prevent damage. Refer to the Jumperoo manual for specific instructions on your model.
Conclusion
Removing the electronic toy from a Jumperoo is simple. Follow the steps carefully for safety. Take your time and avoid forcing parts. This helps keep your Jumperoo in good shape. Enjoy a clean, toy-free play area afterward. This small task makes a big difference.
Keep your baby’s space safe and fun. You can do this easily with patience and care.