
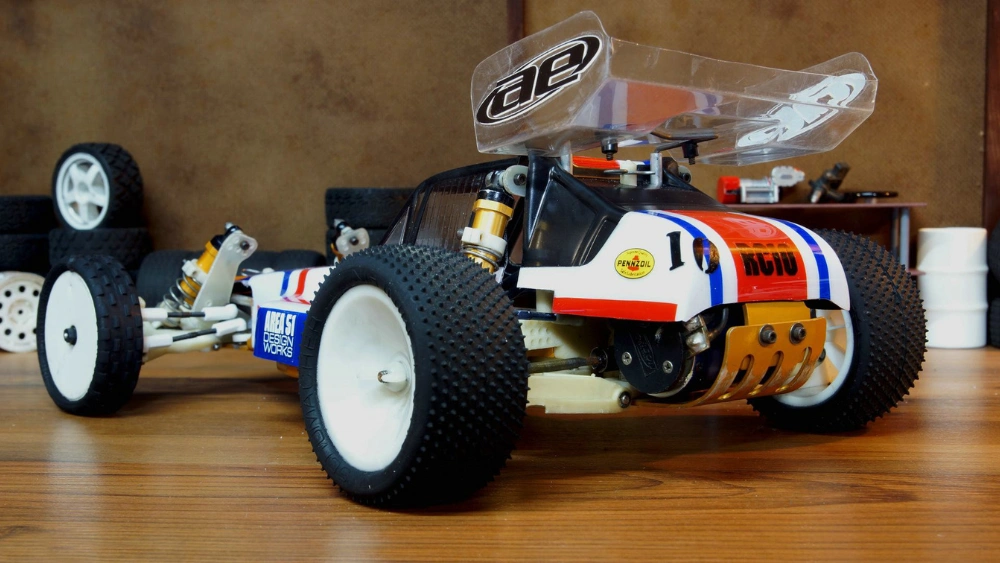
Are you ready to unleash your inner engineer and experience the thrill of creating something with your own hands? Building an RC (remote control) car from scratch might just be the perfect project for you.
Imagine the satisfaction of watching your very own creation zoom across the floor, responding to your every command. This guide is crafted to ignite your curiosity and make the complex process of building an RC car not just understandable, but truly enjoyable.
Ever wondered how those tiny machines race so smoothly, or how they respond so swiftly to controls? You’re about to uncover those secrets. By following this step-by-step guide, you’ll not only learn how to assemble the parts but also gain insights into the fascinating world of remote control technology. Whether you’re a seasoned hobbyist or a curious beginner, this project offers a unique blend of creativity and technical skill, promising a rewarding experience. Dive in, and let’s transform your curiosity into a thrilling hands-on adventure!

Credit: www.youtube.com
Choosing The Right Materials
Selecting suitable materials ensures your RC car’s durability and performance. Opt for lightweight but sturdy components like aluminum or carbon fiber. Quality electronics and durable tires enhance control and speed.
Choosing the right materials is crucial for building a durable RC car. The materials you select affect the car’s performance and longevity. Quality materials ensure your car is lightweight yet sturdy, providing the best racing experience.Body Material
The body material impacts the car’s weight and durability. Common options include plastic, metal, and carbon fiber. Plastic is affordable but less durable. Metal offers strength but adds weight. Carbon fiber is light and strong, ideal for high-performance cars.Chassis Material
The chassis is the car’s backbone. Choose materials like aluminum or fiberglass. Aluminum is lightweight and strong, suitable for fast cars. Fiberglass offers flexibility and resilience, absorbing impacts well.Wheel And Tire Material
Wheels and tires determine grip and stability. Rubber tires provide excellent traction on various surfaces. Foam tires are great for indoor racing, offering smooth rides. Choose wheels made of durable plastic or metal for long-lasting use.Motor Material
The motor is the heart of the RC car. Select motors with copper windings for efficiency and power. High-quality magnets ensure better performance. Invest in a reliable motor to boost your car’s speed and endurance.Batteries
Choose batteries that match your car’s power needs. Lithium polymer batteries are popular for their lightweight and powerful output. Ensure compatibility with your motor for optimal performance.Electronic Components
Electronic components include servos and controllers. Opt for durable and responsive parts. Quality electronics enhance control and responsiveness, making your RC car easier to maneuver.
Credit: www.youtube.com
Building The Chassis
Building the chassis involves selecting lightweight yet strong materials. Securely assemble parts to ensure stability. This foundation supports the RC car’s components effectively.
Building the chassis of an RC car is both an art and a science. It’s the backbone of your vehicle, determining not only its shape but also its performance. A well-built chassis sets the stage for a smooth ride and optimal speed. You’ll want a sturdy base, but flexibility is key to tackling different terrains. Here’s how to get started. Your choice of materials will influence the durability and weight of your RC car. Many hobbyists swear by aluminum because it’s lightweight yet strong. Others prefer carbon fiber for its high performance despite the higher cost. Think about what you need: affordability or top-tier performance?Designing The Frame
Designing the frame is where your creativity comes into play. Sketch out your ideas on paper before cutting any materials. Consider the placement of components like the motor and battery. Keep the frame balanced for better maneuverability. How would you like your car to handle corners?Assembling The Parts
Once your design is ready, it’s time to assemble the parts. Use screws and bolts to join the components securely. Make sure each piece aligns perfectly to avoid any wobbling during operation. Have you ever felt the frustration of a wobbly wheel on a toy car? Secure assembly prevents that.Testing The Stability
Before moving on, test the stability of your chassis. Place it on a flat surface and check for any imbalance. Make minor adjustments as needed to ensure it sits evenly. A stable chassis is like a solid foundation for a house—it’s essential for everything else to work well.Customizing For Performance
Customizing your chassis can give your RC car a competitive edge. Add suspension systems to absorb shocks on rough terrain. Consider adjustable wheel mounts for better control. Experiment with different setups to find what works best. What tweaks can make your car the fastest on the track? Building the chassis is a rewarding process. Each decision impacts how your RC car performs. So choose wisely, plan meticulously, and enjoy the journey of creation.Installing Electronics And Testing
Connect the motor and receiver, ensuring wires are securely attached. Test each component separately to confirm functionality.
Installing the electronics in your RC car can be both an exciting and challenging part of your project. It’s the moment when your creation comes to life, a blend of mechanics and technology. Proper installation ensures your car performs at its best, offering speed, control, and reliability. But how do you know if you’ve done it right? This is where testing comes into play, providing the feedback needed to fine-tune your setup.Choosing And Installing The Battery
The heart of your RC car’s electronics is the battery. Choose a battery that matches your motor’s requirements for optimal performance. Secure it firmly within the chassis to prevent movement during operation.
Ensure the connectors are properly attached to avoid any power interruptions. It’s crucial to check the polarity to prevent damage to your electronics.
Mounting The Motor
The motor is where the magic happens, converting electrical energy into motion. Carefully mount the motor onto the chassis, ensuring it’s aligned with the wheels for efficient power transfer.
Double-check the screws to avoid any loose fittings that might affect performance. A well-mounted motor provides smooth acceleration and speed.
Connecting The Esc (electronic Speed Controller)
The ESC controls the motor’s speed and direction. Connect it between the battery and the motor, ensuring all wires are secured tightly.
Adjust the settings according to your driving style. Remember, a well-configured ESC can be the difference between a smooth ride and a jerky experience.
Setting Up The Receiver
The receiver is your link to controlling the car remotely. Install it in a location where it won’t be blocked by other components, ensuring a strong signal.
Pair it with your transmitter and test the range. A reliable connection is crucial for maintaining control over your car.
Testing And Troubleshooting
Testing is where theory meets reality. Begin with simple movements to ensure everything responds correctly.
If your car isn’t behaving as expected, check the connections and settings. Sometimes, a minor adjustment can make a significant difference.
Have you ever experienced your car veering off unexpectedly? It might be a calibration issue with your ESC or receiver. Address these issues promptly to enjoy the thrill of your perfectly functioning RC car.

Credit: www.youtube.com
Frequently Asked Questions
Can We Make An Rc Car At Home?
Yes, you can make an RC car at home using basic tools and materials. Follow online tutorials for guidance. Choose components like motors, wheels, and remote control carefully. Assemble parts and test your creation. Building RC cars can be a fun and educational DIY project for enthusiasts.
How Can I Build My Own Rc Car?
To build your own RC car, gather components like a chassis, motor, battery, and controller. Assemble them by following a detailed guide or tutorial. Customize parts for improved performance. Ensure all connections are secure for optimal functioning. Test and tweak settings for desired speed and control.
What Do I Need To Make An Rc Car?
To make an RC car, you’ll need a chassis, motor, battery, electronic speed control, transmitter, receiver, wheels, and servo. Ensure compatibility and quality for optimal performance. Basic tools like screwdrivers and pliers are also required for assembly. Choose parts based on your experience level and desired specifications.
How To Make An Rc Car At Home Step By Step?
Gather materials: motors, wheels, chassis, battery, and remote controller. Assemble the chassis. Attach motors and wheels. Connect battery to motors. Install remote control system. Test your RC car. Adjust components for optimal performance. Enjoy your homemade RC car!
Conclusion
Building an RC car is a rewarding experience. You learn while having fun. Each step brings joy and excitement. Start small, then grow your skills. Use simple tools and follow easy instructions. Experiment with different designs. Customize your car to your liking.
Share your creation with friends. Enjoy races and challenges together. Remember, patience leads to success. Mistakes teach valuable lessons. Your car reflects your creativity. Keep exploring new ideas. Each new car is a new adventure. Enjoy every moment of the process.